Creating Distribution Lists/Contact Groups
CloudMail users can easily create categories and assign contacts to categories in order to send messages to a select group of email addresses. In email systems this practice is generally referred to as creating distribution lists or contact groups.
Creating Contact Categories
Sending Emails to Contacts in Categories
Creating Contact Categories
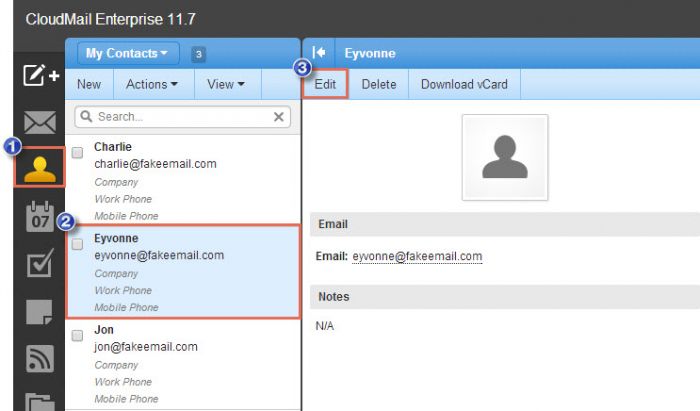
To begin, log into CloudMail, open your contacts, open an individual contact that you'd like to add to a category, and click on the "Edit" option in the menu.
In the next window, click on the "Categories" tab. By default, you won't have any categories created for your CloudMail account. Select "Master Categories" to create a new category.
In the next window, enter the name of each category (each contact group/distribution list) that you'd like to create. Each group should be listed on a separate line.
Once you've created the categories, you'll be returned to the individual user's profile. Assign the user the appropriate categories and save your work.
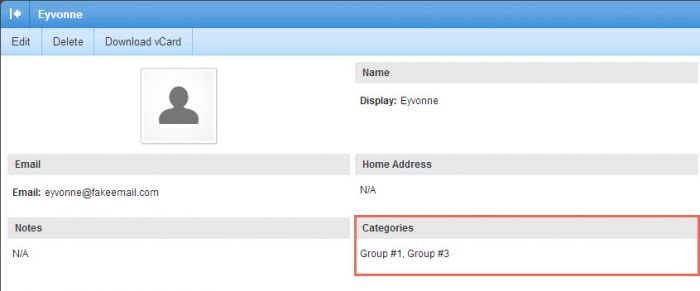
In the contact's profile, you can view which categories they're assigned to.
Add additional contacts the categories you've created using the same process, except this time you'll see the categories listed under the "Categories" tab when you edit their profile.
Back to Top
Sending Emails to Contacts in Categories
To send an email to all contacts in a category, open up your contacts, click on "View", select "Filter" and then "Category".
In the next window, select the category that you'd like to display.
You'll now be viewing just the contacts in this individual category. Next, you can select all contacts manually by clicking the check box next to the contact name, or by clicking on "Actions" and "Select All".
After the contacts are selected, click on "Actions" and "Send Email". At this point, you can compose the email and send it to the category.
Back to Top

Do you have suggestions for improving this article?
We take a great deal of pride in our knowledgebase and making sure that our content is complete, accurate and useable. If you have a suggestion for improving anything in this content, please let us know by filling out this form. Be sure to include the link to the article that you'd like to see improved. Thank you!


