Transferring a Domain Name to CloudAccess.net
This article contains detailed instructions for transferring a domain name to CloudAccess.net. Before you begin, make sure to contact the current registrar for the domain name and locate or request the following:
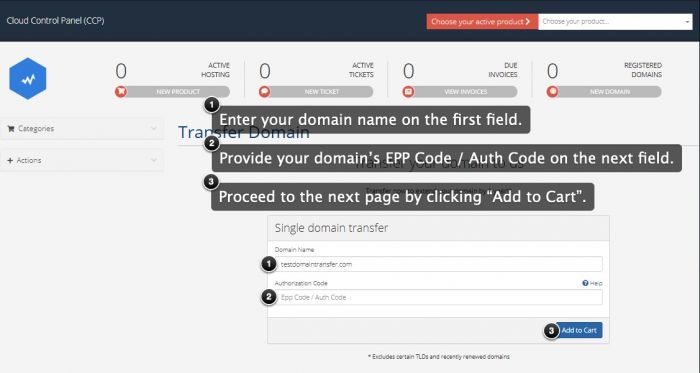
- locate your EPP code (write this down).
- keep the domain unlocked.
Next, log in into your CloudAccess.net Cloud Control Panel™(CCP). Once in the CCP, click on the "New Product" button.
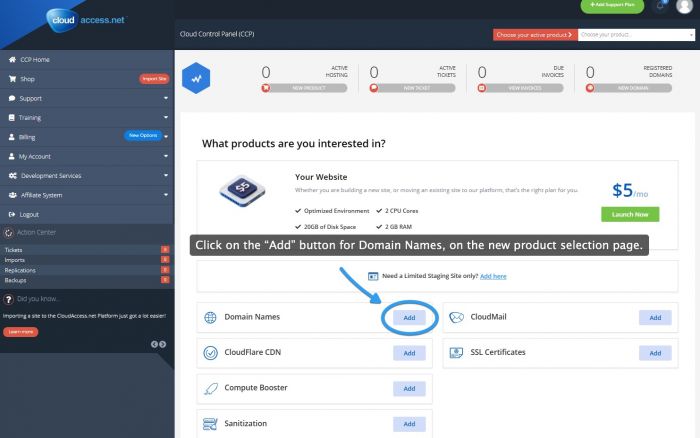
When selecting a product, click on the "Add" button next to "Domains".
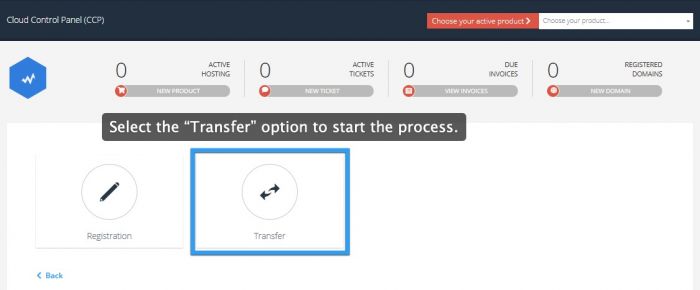
In the next window, click on the "Transfer" button.
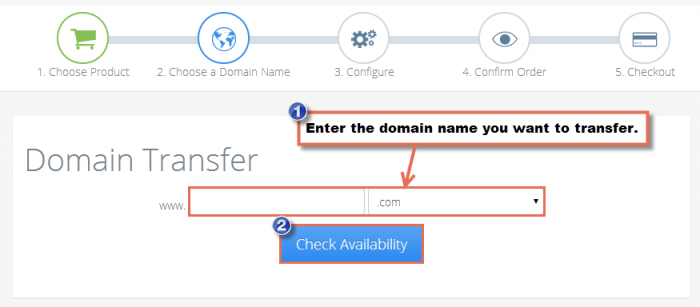
In the next window, enter the domain name you wish to transfer and click on "Check Availability".
If the domain is available to be transferred, you'll receive a message letting you know. Pick a payment duration option and then click on "Add to Cart".
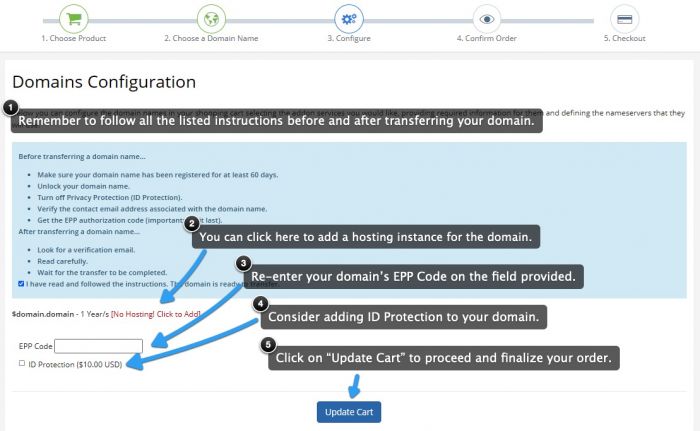
Your shopping cart will be updated and a "Domains Configuration" area will appear. Be sure to follow all of the steps indicated before and after transferring your domain name. You can also select ID Protection. Learn more about ID Protection. You'll also have the option to select your name-server settings. If your site is hosted with CloudAccess.net, you can leave the name server settings as is. If your site is hosted elsewhere, you'll have to contact your hosting company to find the name server settings you should be using. Click "Update Cart" when you're done.
We will send you an email confirmation of the domain transfer or we will let you know if it fails for some reason.
Back to Top

Do you have suggestions for improving this article?
We take a great deal of pride in our knowledgebase and making sure that our content is complete, accurate and useable. If you have a suggestion for improving anything in this content, please let us know by filling out this form. Be sure to include the link to the article that you'd like to see improved. Thank you!


