Subdomain Redirect
If your Joomla or WordPress site is managed by our DNS records (meaning the name servers are pointed to ns1.gridfast.net and ns2.gridfast.net), you have an additional tool at your disposal - subdomain redirects. This will help you if you need a simple URL to redirect to an external service, like dedicated e-commerce solution, social media pages or your YouTube channel. In this guide we will show you how to create one.
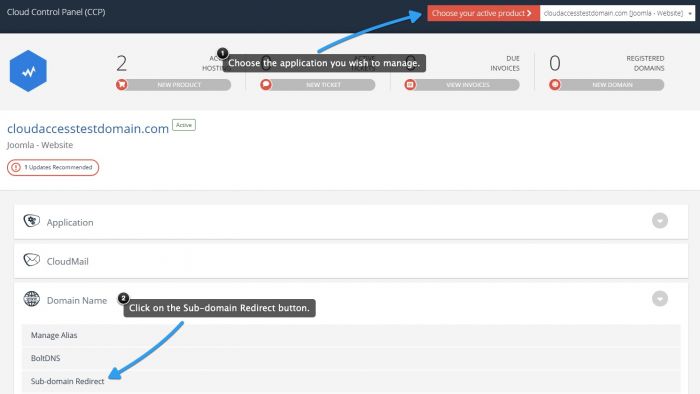
To setup a sub-domain redirect, log into your CloudAccess.net Cloud Control Panel™(CCP) and select the application you'd like to work with at the top-right part of the page. Then, click on the "Domain Name" section, and choose the "Sub-domain Redirect" option.
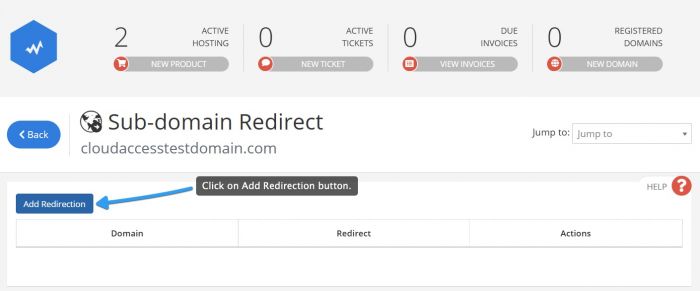
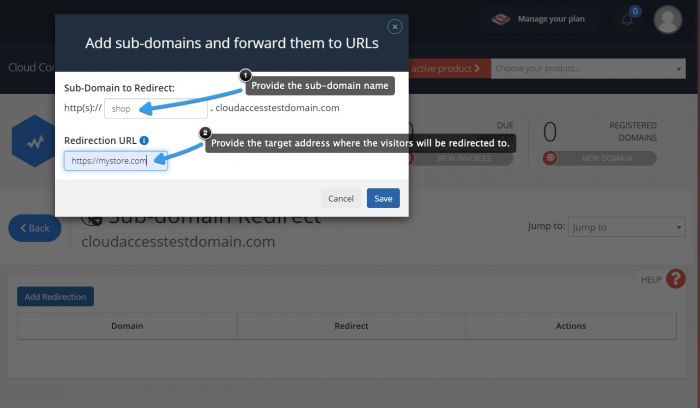
Once you click the "Add Redirection" button, a new window will show up. You will need to provide the sub-domain name and a target address where the visitors will be redirected to.
Once you click the "Add redirection" button, a new window will show up - you will need to provide the sub-domain name, and a target address, where the visitors will be redirected:
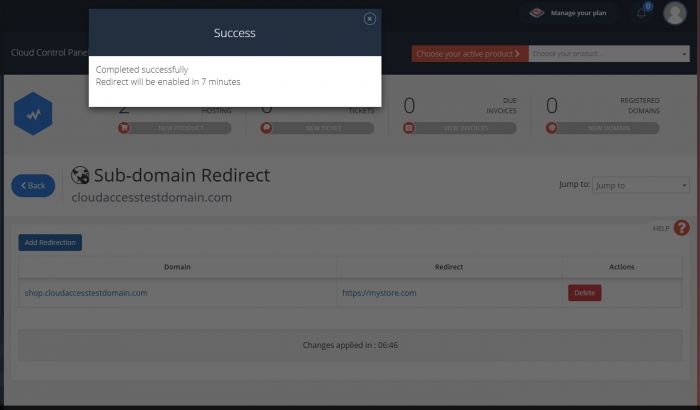
When you save the redirect, it will appear on the list, and a confirmation message will show up. It will tell you how long it will take until the redirect is active.
Please remember that this involves DNS propagation - it might take up to an hour for the change to fully take effect.

Do you have suggestions for improving this article?
We take a great deal of pride in our knowledgebase and making sure that our content is complete, accurate and useable. If you have a suggestion for improving anything in this content, please let us know by filling out this form. Be sure to include the link to the article that you'd like to see improved. Thank you!


