Your SLA, also called the Support Plan, defines the level of service we can provide you. Without one, we can only provide basic hosting support through tickets, while the Standard plan allows us to help you with application issues over tickets, calls or live chat, with the Business plan receiving more detailes support still. Each support plan also unlocks certain advanced features in the Cloud Control Panel. You can view the details of our different SLAs on this page.
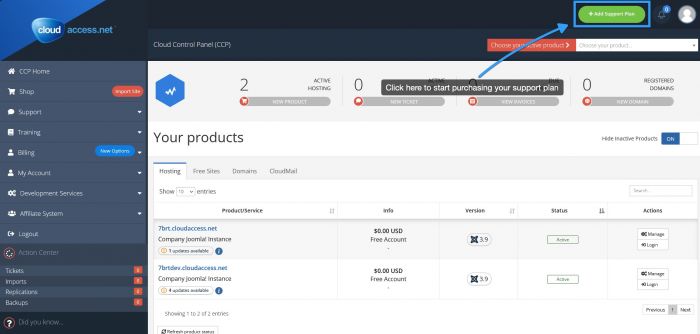
This tutorial will show you how to purchase an SLA product of your choosing. First, you will need to click the Add Support Plan button in the upper right corner of the Cloud Control Panel.
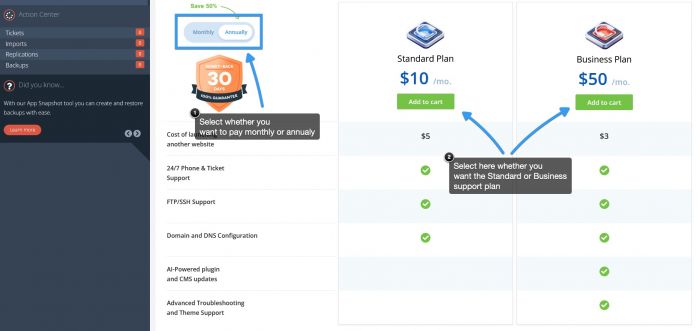
On the next screen you will be able to choose which SLA you want to purchase and whether you want to be billed monthly or annually.
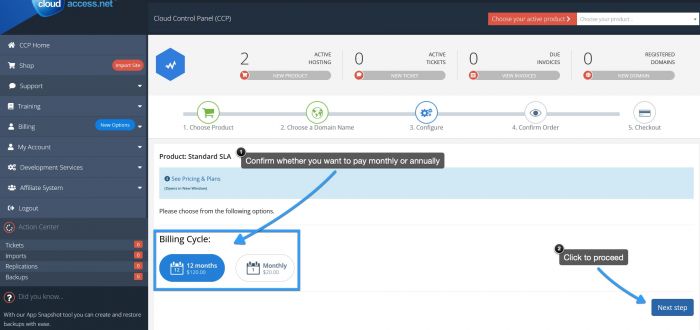
On the next screen, you will need to confirm whether you want to be billed monthly or annually.
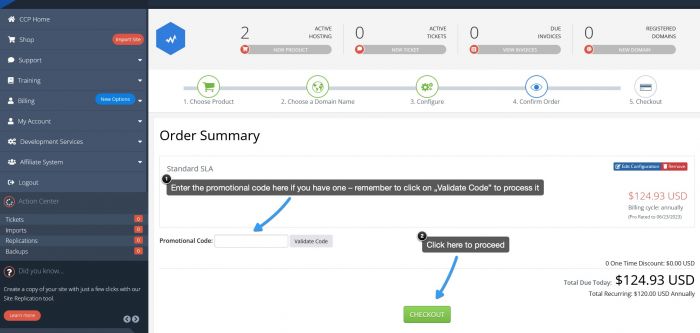
If you have a promotional code, the next screen will allow you to apply it to this purchase.
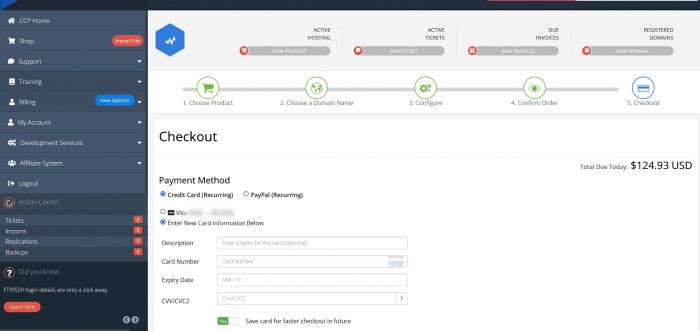
Once that's done, all you need to do is select what payment method you want to use for your SLA and confirm the purchase.
And all done - you now have a support plan and can enjoy the multitude of services and features we offer!

Do you have suggestions for improving this article?
We take a great deal of pride in our knowledgebase and making sure that our content is complete, accurate and useable. If you have a suggestion for improving anything in this content, please let us know by filling out this form. Be sure to include the link to the article that you'd like to see improved. Thank you!


