Upgrading Your Free Hosting Site
Upgrading your Free Hosting site is just a couple clicks away. Please note, if your site is suspended (which happens automatically if you don't log into the Cloud Control Panel frequently), you will need to contact us by submitting a support ticket. If your free site is not suspended, follow the simple steps below to upgrade your site.
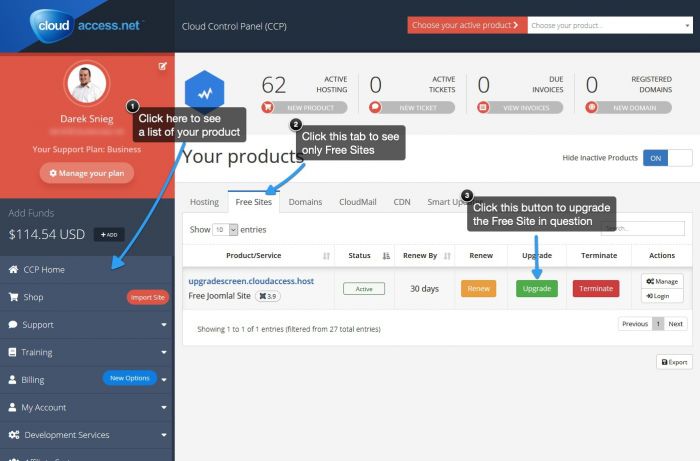
1. First, log in to your CloudAccess.net Cloud Control Panel™(CCP). Once in the CCP, make sure that you're on the CCP Home screen, click the Free Sites tab above the product lits and click the Upgrade button.
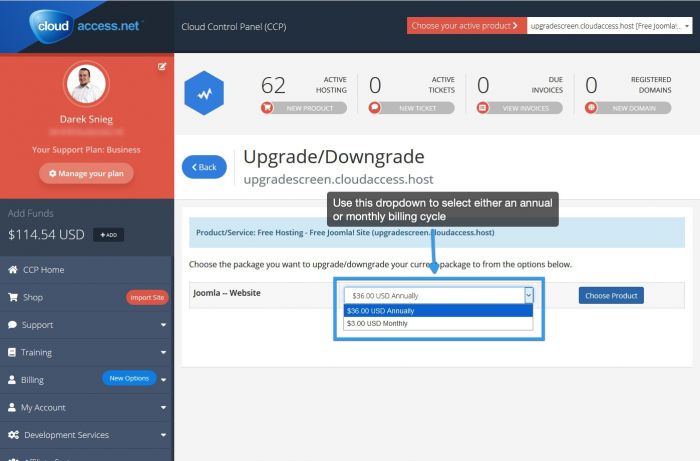
2. Click the dropdown in the next screen to choose what billing cycle you'd like this site to be on - monthly or annual. Remember that if you go with an annual billing cycle, it will effectively cut the price of the hosting in half!
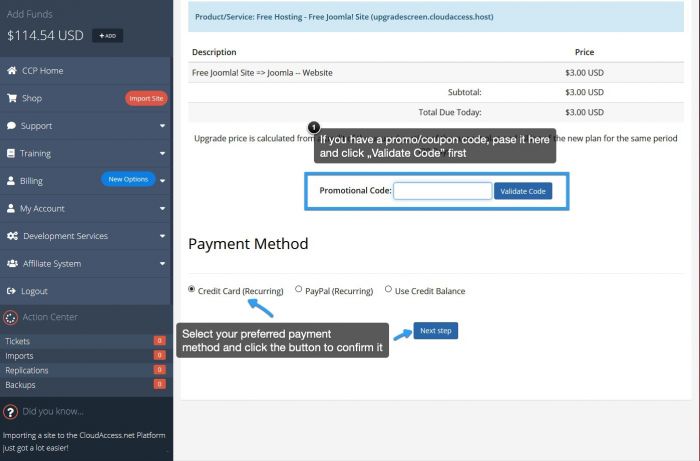
3. In the next window, review the description of the product/service that you're purchasing, enter a promotional code if you have one and select a Payment Method. When you're done, click on "Next Step".
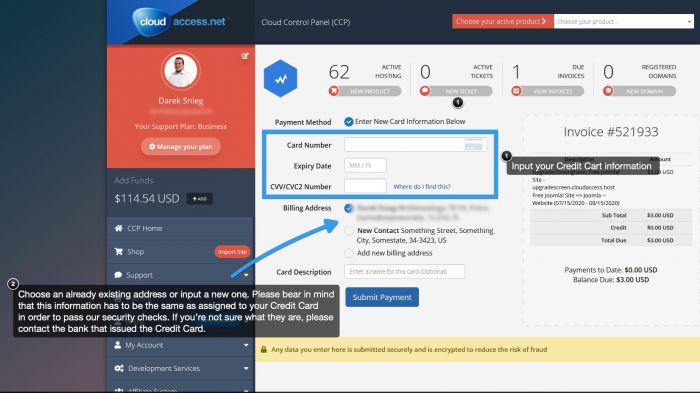
4. Your checkout process will look differently depending on the payment method you've chosen. The screenshots below are taken using the credit card payment method. Confirm your "Billing Information", enter your credit card details and click on the "Submit Payment" button.
5. Place your order, and you'll be done. You'll receive a confirmation email shortly after completing your order.

Do you have suggestions for improving this article?
We take a great deal of pride in our knowledgebase and making sure that our content is complete, accurate and useable. If you have a suggestion for improving anything in this content, please let us know by filling out this form. Be sure to include the link to the article that you'd like to see improved. Thank you!


