Changing a Template Background Using FTP
Incorporating a background image into your Joomla Instance is a great way to personalize and customize a template. Many templates don't offer an option to do something like this in the Administration area (the back end) of your Joomla Instance, this article offers a solution using file transfer protocol (FTP). Please note that this article is about adding a personalized background image for templates based on the Gantry framework in Joomla 2.5. If you are using a 3rd party template, and it is not based on the Gantry framework, we advise that you contact the developer to inquire about how to perform this function.
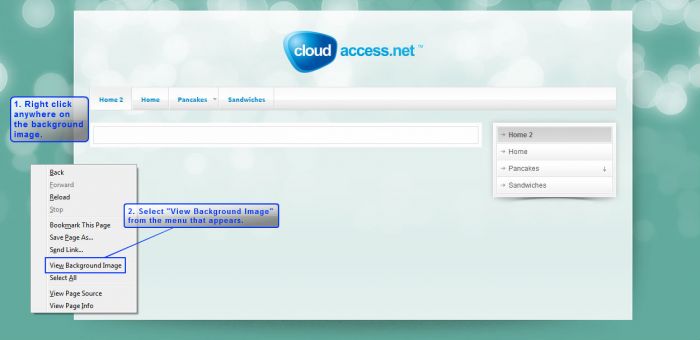
We suggest that you first use the Firefox browser to get the uniform resource locator (URL). To get the URL using Firefox, go to the front end of your Joomla Instance. Right click anywhere on the background image and select "View Background Image" from the pop-up menu.
You will see a new URL in the URL bar. It will look something like what you see below.
The URL is a string of constituents that will take you to a resource on the Internet. The different parts of the URL put together a path that you can take to access the correct folder while you use FTP. In the example above, the name of the current background image is "pattern_4.png" (the last piece of the URL). You'll use that path more in a moment. For now, keep or record this URL somewhere for easy access.
The next step is to find the image that you want to use as your new background image and save it to your PC. It's very important to note that you need to select high resolution images with the right dimensions in order for the image to look the way you want it to in your background. Rename the image to match the current background image's name. Using the example above, you would rename the file "pattern_4.png". You're renaming it as the same name, because you're going to overwrite the current file using FTP, and the names have to match.
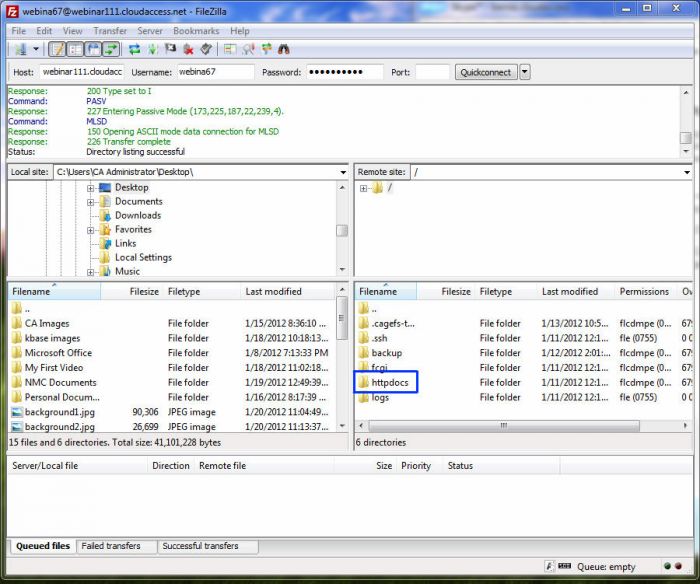
Next, log in to FTP. Learn how to access your FTP login details. Once you've logged in to the site using FTP, locate and open the httpdocs folder. Most templates are found in this folder.
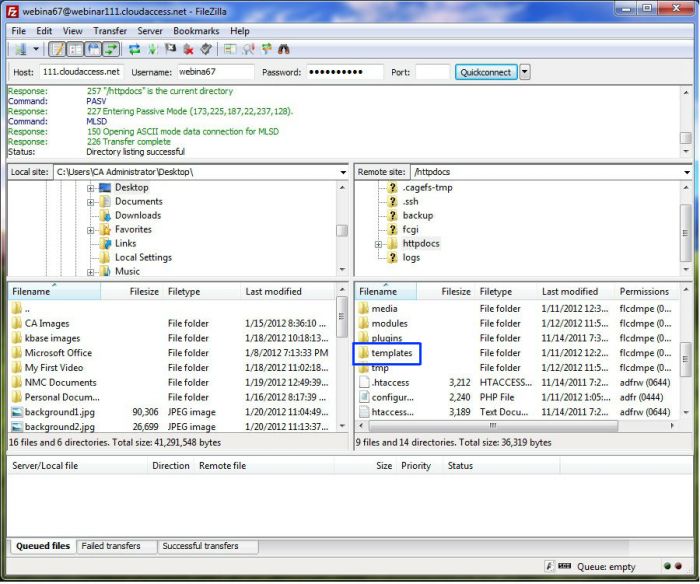
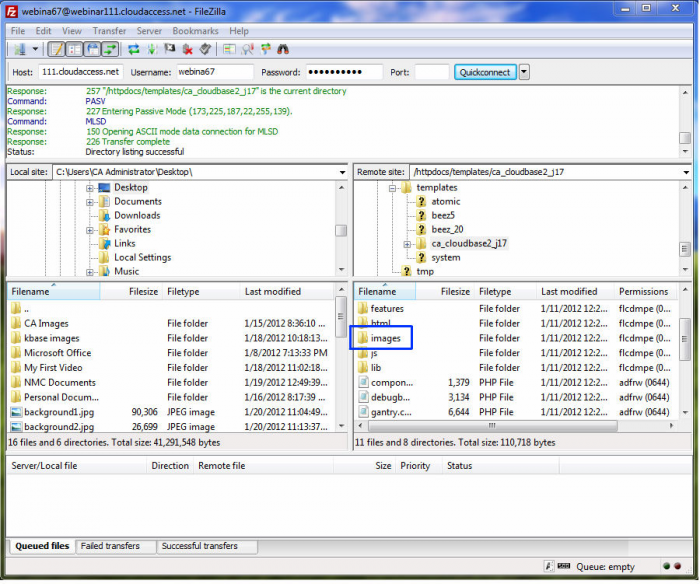
Next, locate and open the templates folder.
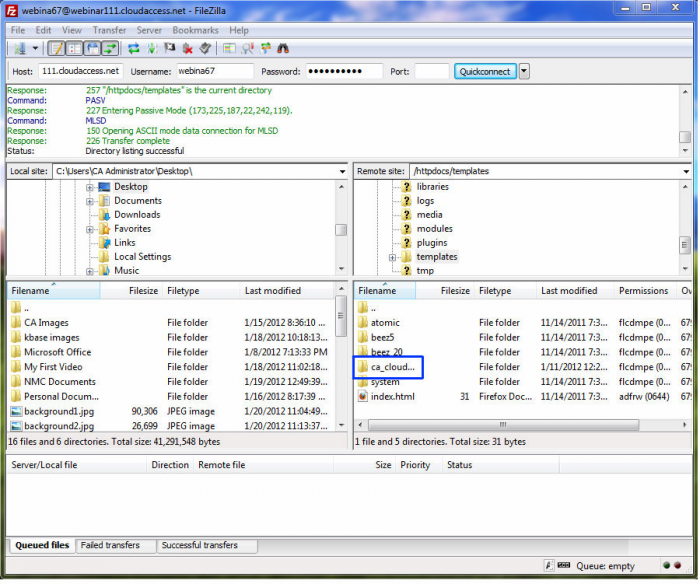
Then you'll open up the template that is currently selected as your site's default template. For the purposes of our screenshots, the template name that appears in the URL is ca_cloudbase2_j17, so that's the one we'll select using FTP.
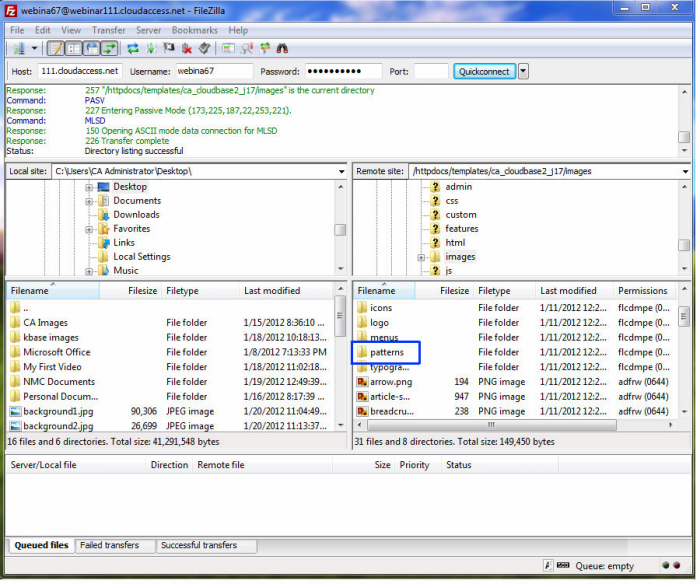
Using our URL as a guide, we'll continue by opening the images folder.
And then our patterns folder.
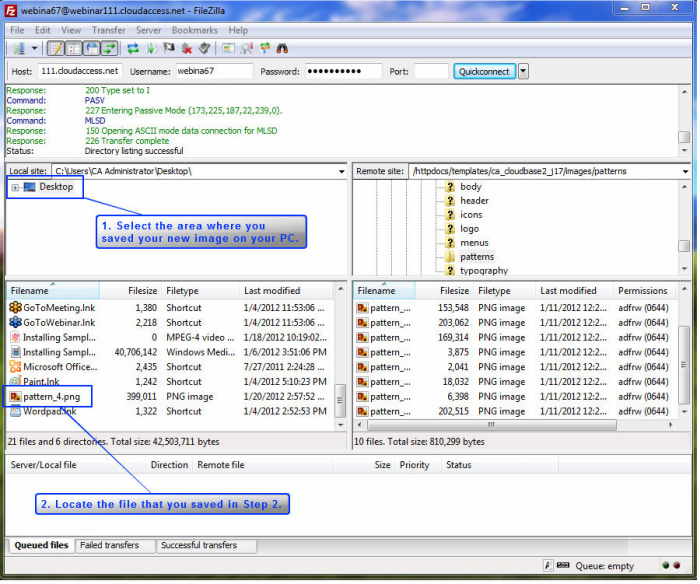
Once inside the patterns folder, you'll want to find the image on your PC that will replace the original image. You already renamed this image in a step above. For the purposes of this article, we saved the "pattern_4.png" on our desktop.
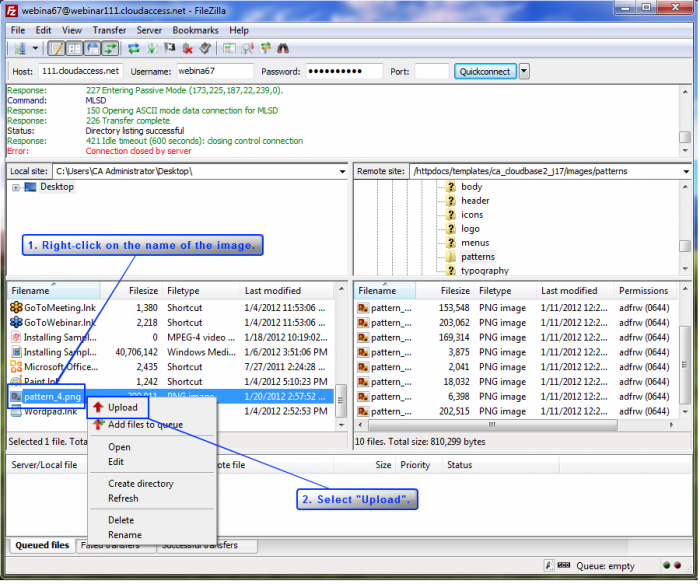
Locate your new image, select it, and right click on the image's name. Select the "Upload" option from the menu that opens up.
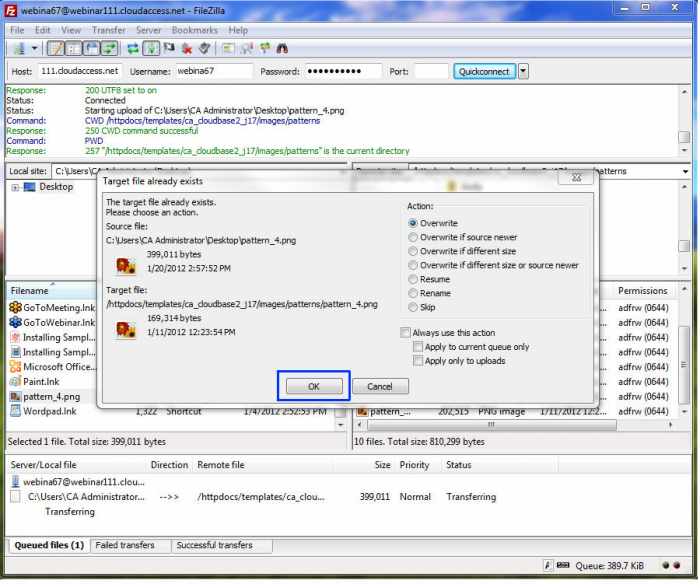
By uploading the file that has a same file name in the patterns folder that is currently open in the opposite window in FTP, you will replace the "pattern_4.png" file. You'll be asked if you want to overwrite the file. Select "OK".
Once the upload is complete, go back to the front end of your Joomla Instance, hit refresh, and you will see your new background image.
Back to Top

Do you have suggestions for improving this article?
We take a great deal of pride in our knowledgebase and making sure that our content is complete, accurate and useable. If you have a suggestion for improving anything in this content, please let us know by filling out this form. Be sure to include the link to the article that you'd like to see improved. Thank you!


